|
|
|
|
|
|
|
|
|
Signal Acquisition [OpenSignals] |
| Tags | record☁acquire☁opensignals☁real-time |
OpenSignals
![]() is the PLUX's software dedicated to acquire, store and process physiological signals acquired with electronic devices developed and commercialized by the company (such as
biosignalsplux
is the PLUX's software dedicated to acquire, store and process physiological signals acquired with electronic devices developed and commercialized by the company (such as
biosignalsplux
![]() and
BITalino
and
BITalino
![]() ).
).
Signal acquisition is a fundamental step that needs to be executed before every processing task. Without signals there are not any information to analyze or knowledge to extract.
Like previously referred, OpenSignals ensures that anyone with a PLUX's acquisition system can easily acquire physiological data through a desktop or mobile device.
So, in the current Jupyter Notebook we will begin our introductory journey through OpenSignals , explaining/demonstrating how signals can be acquired in real-time.
Before starting an acquisition it is mandatory that your PLUX acquisition system (in our case
biosignalsplux
) is paired with the computer.
There is available a
Jupyter Notebook
entitled
"Pairing a Device at Windows 10 [biosignalsplux]"
![]() intended to help you in the pairing process between
biosignalsplux
and your computer.
intended to help you in the pairing process between
biosignalsplux
and your computer.
0 - Execute steps 8 to 10 of
"Pairing a Device at Windows 10 [biosignalsplux]"
![]() , in order to enable your device before starting the acquisition
, in order to enable your device before starting the acquisition
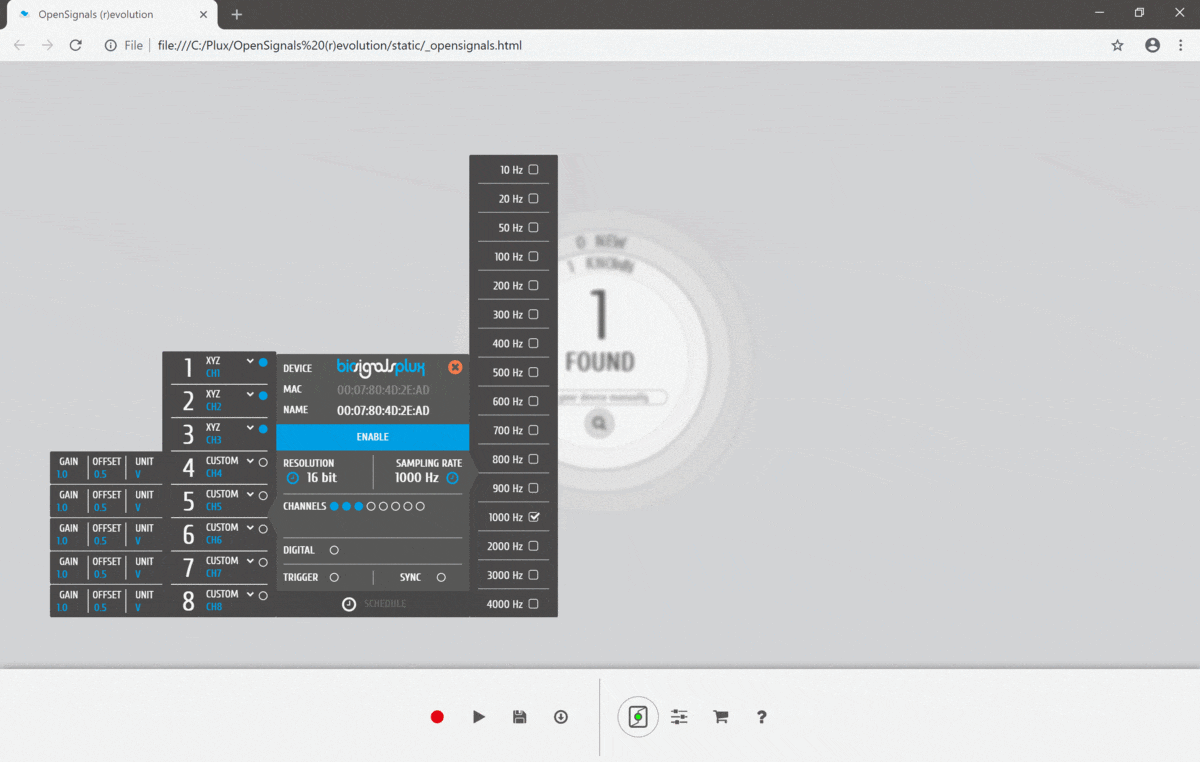
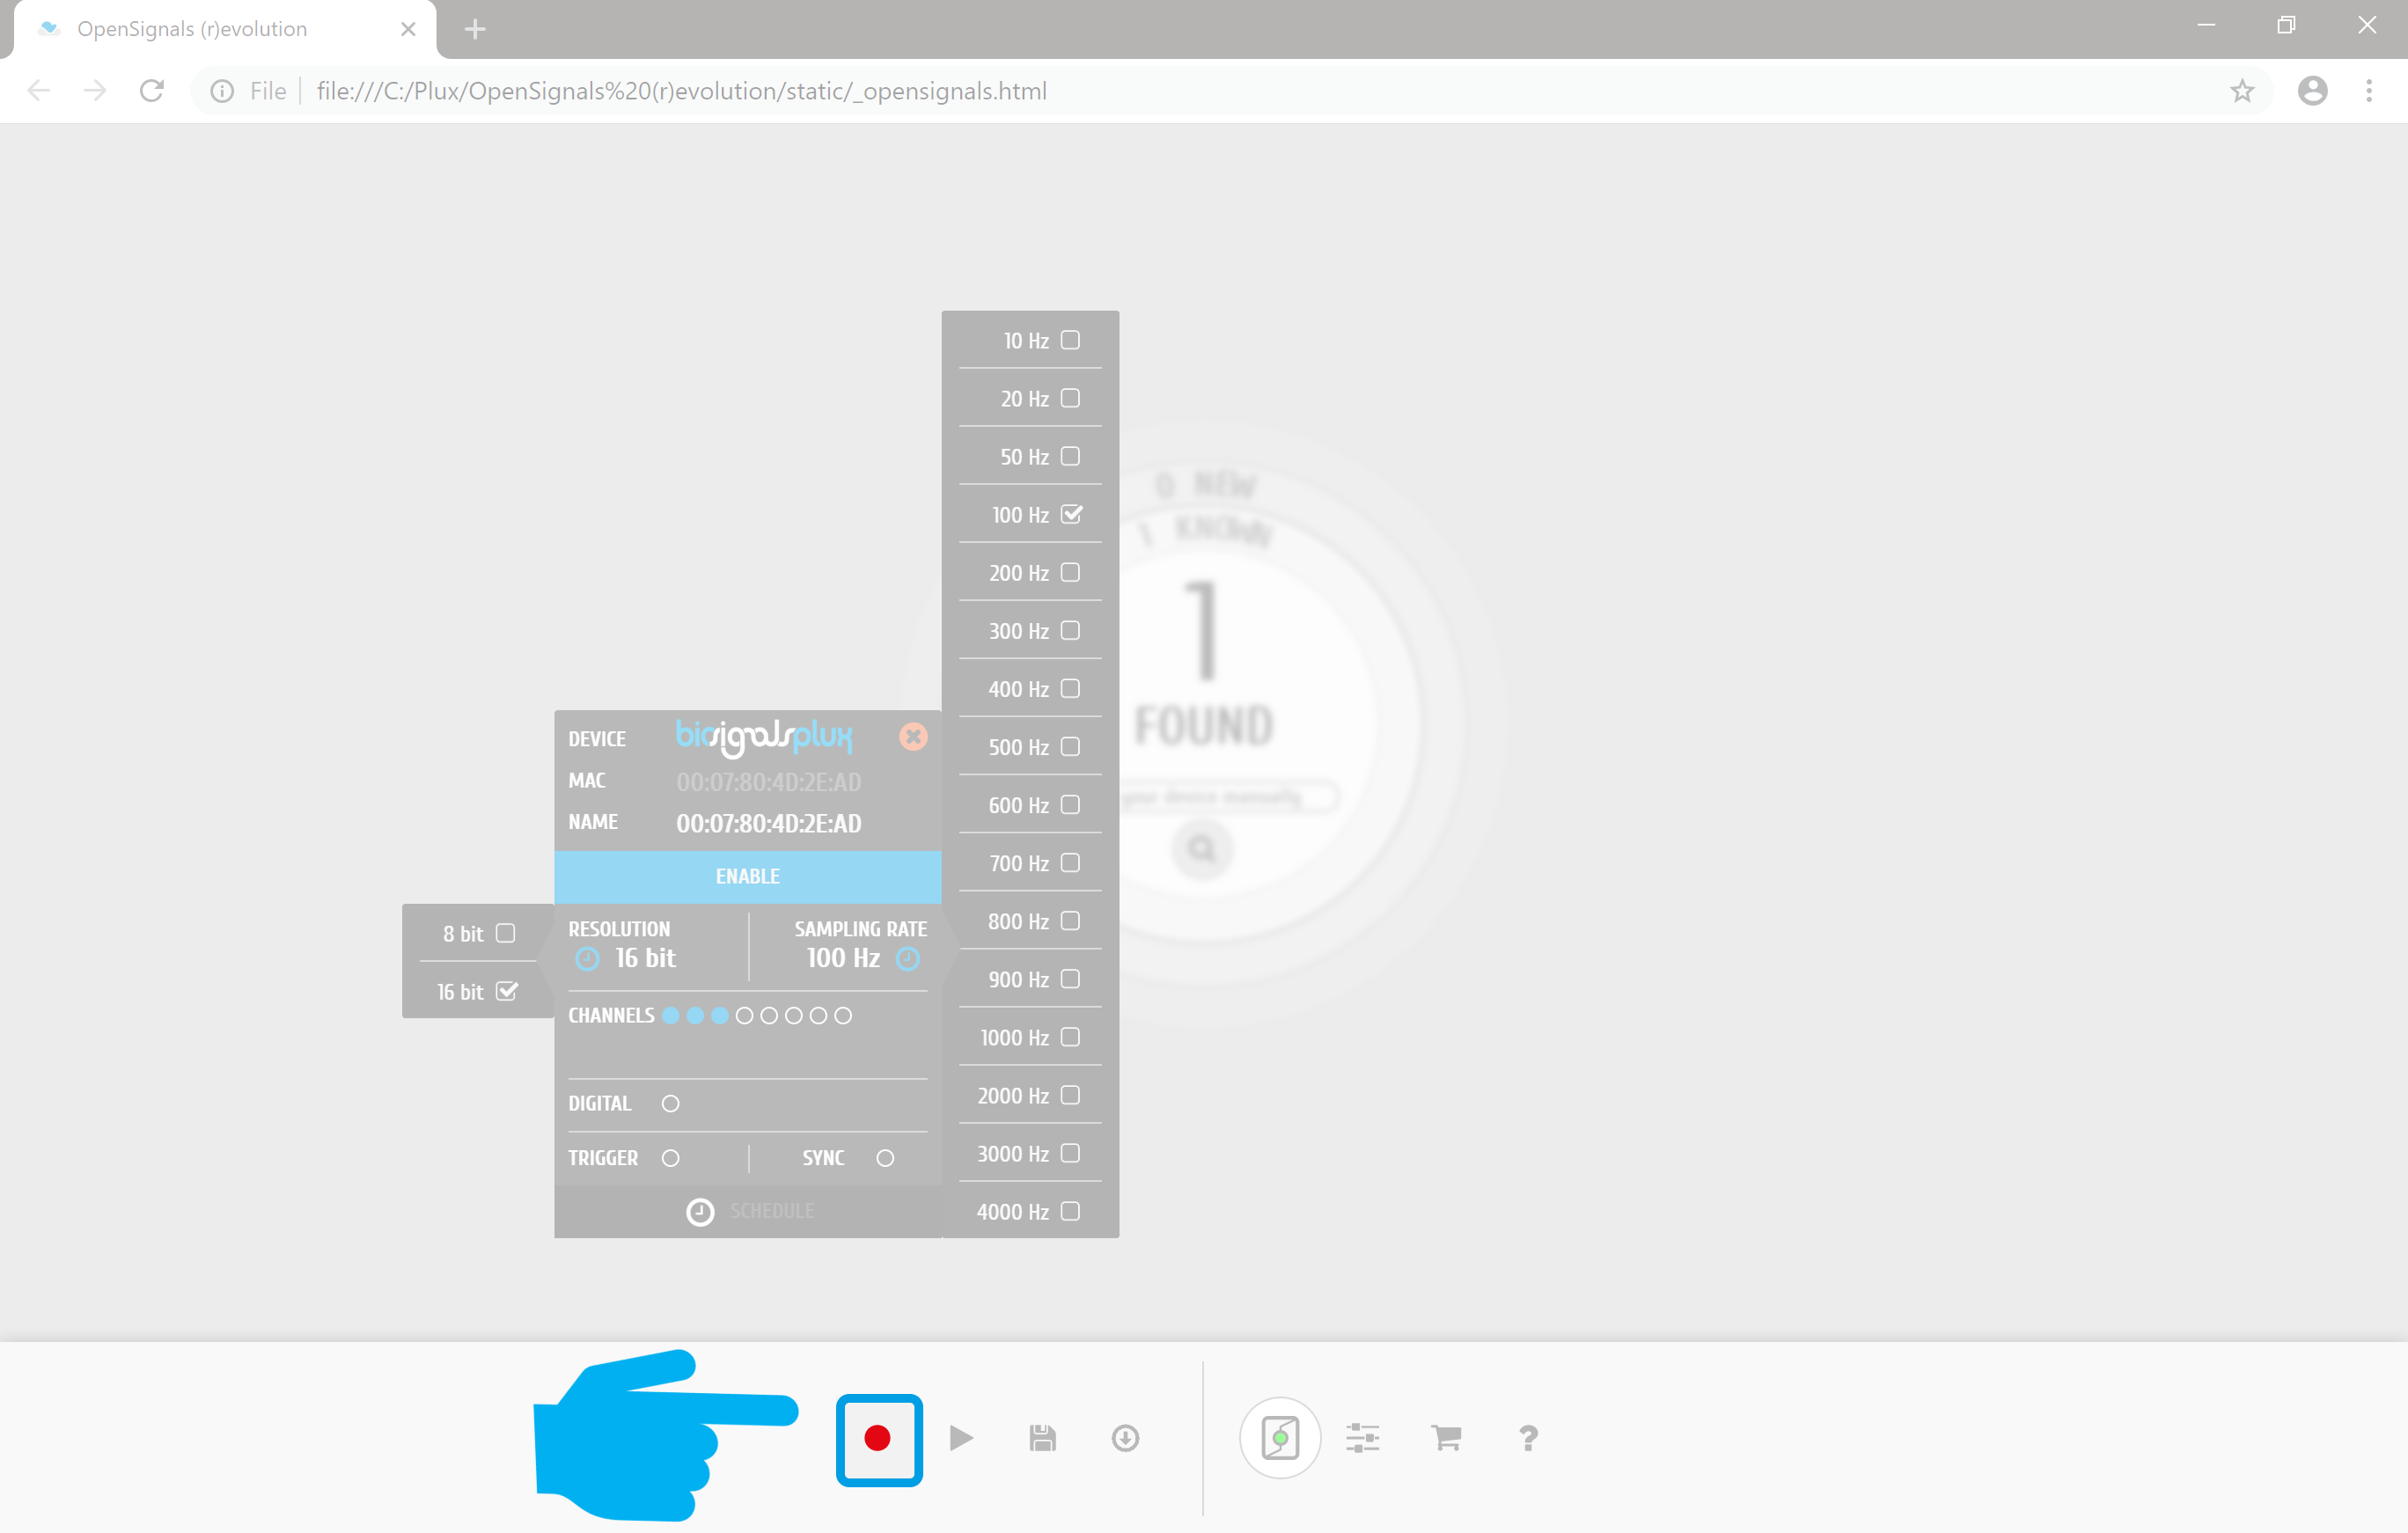
1 - Click on the device box. A set of configurable options will appear
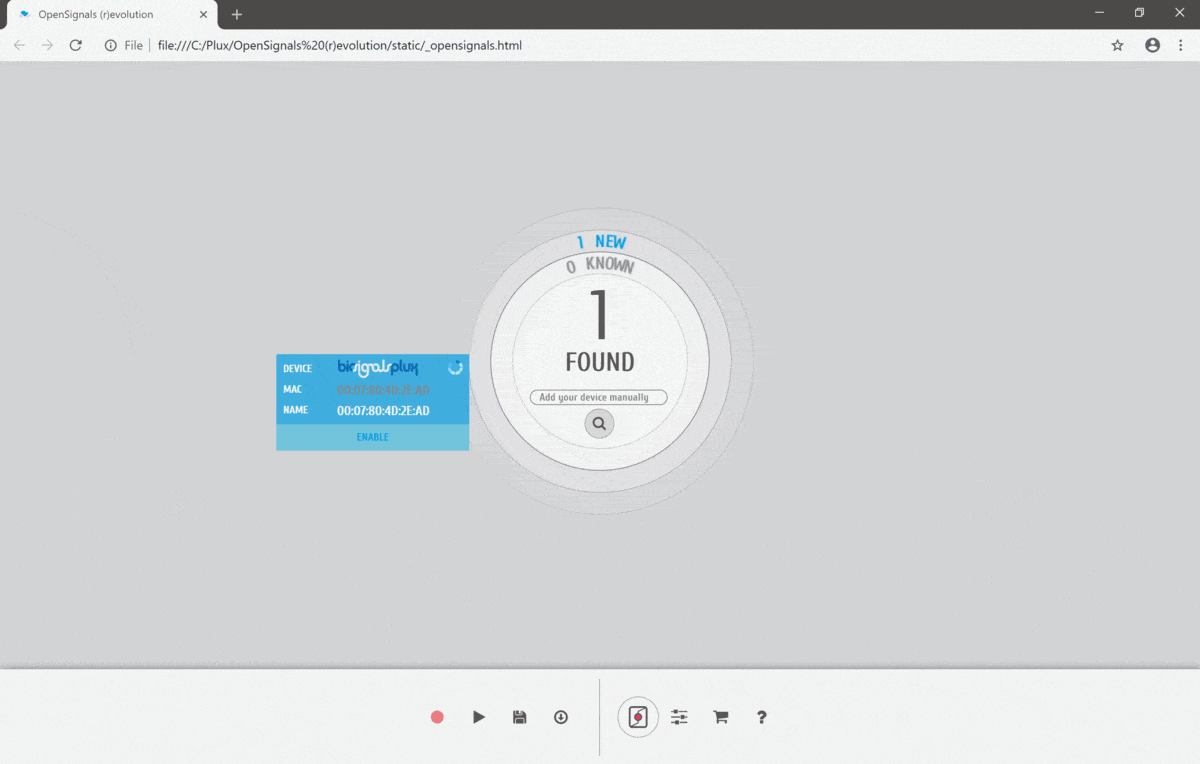
2 - For the current example we will pair an accelerometer (triaxial sensor). Three channels of our
biosignalsplux
device are necessary for doing the acquisition
(Channel 1 >> Axis X, Channel 2 >> Axis Y, Channel 3 >> Axis Z)

3 - Activate the used channels and select the respective sensor type
When clicking on our device we can see lots of options and components. Let's focus on the left section of the following image3.1 - Activate the used channels
For activating the channels that will be used during the acquisition just click on the "Status Circle" of the respective channel row.

3.2 - Select the respective sensor type for each channels (for our accelerometer example, we need to select option "XYZ")
For selecting the desired sensor type you should press on the downside arrow to see a list box containing the available options.

4 - Specify the desired sampling rate, taking into consideration the signal that you will acquire
For a more deep information about sampling rate choice, there is a Jupyter Notebook available in our library
5 - Select the device resolution
Bigger resolutions ensures a more precise data acquisition but there is the risk of collecting also more noise

6 - There is only one remaining step left. Just press "Record" button to start acquiring your accelerometer data
The previous steps ensure that all users of PLUX"s acquisition systems can start their acquisition establishing an important step for beginning the experimental stage of any research.
For concluding, is shown a small video of a real-time accelerometer acquisition made with OpenSignals !
We hope that you have enjoyed this guide.
biosignalsnotebooks
is an environment in continuous expansion, so don"t stop your journey and learn more with the remaining
Notebooks
![]() !
!